How to Add LUTs in CapCut? Best Step-by-Step Guide
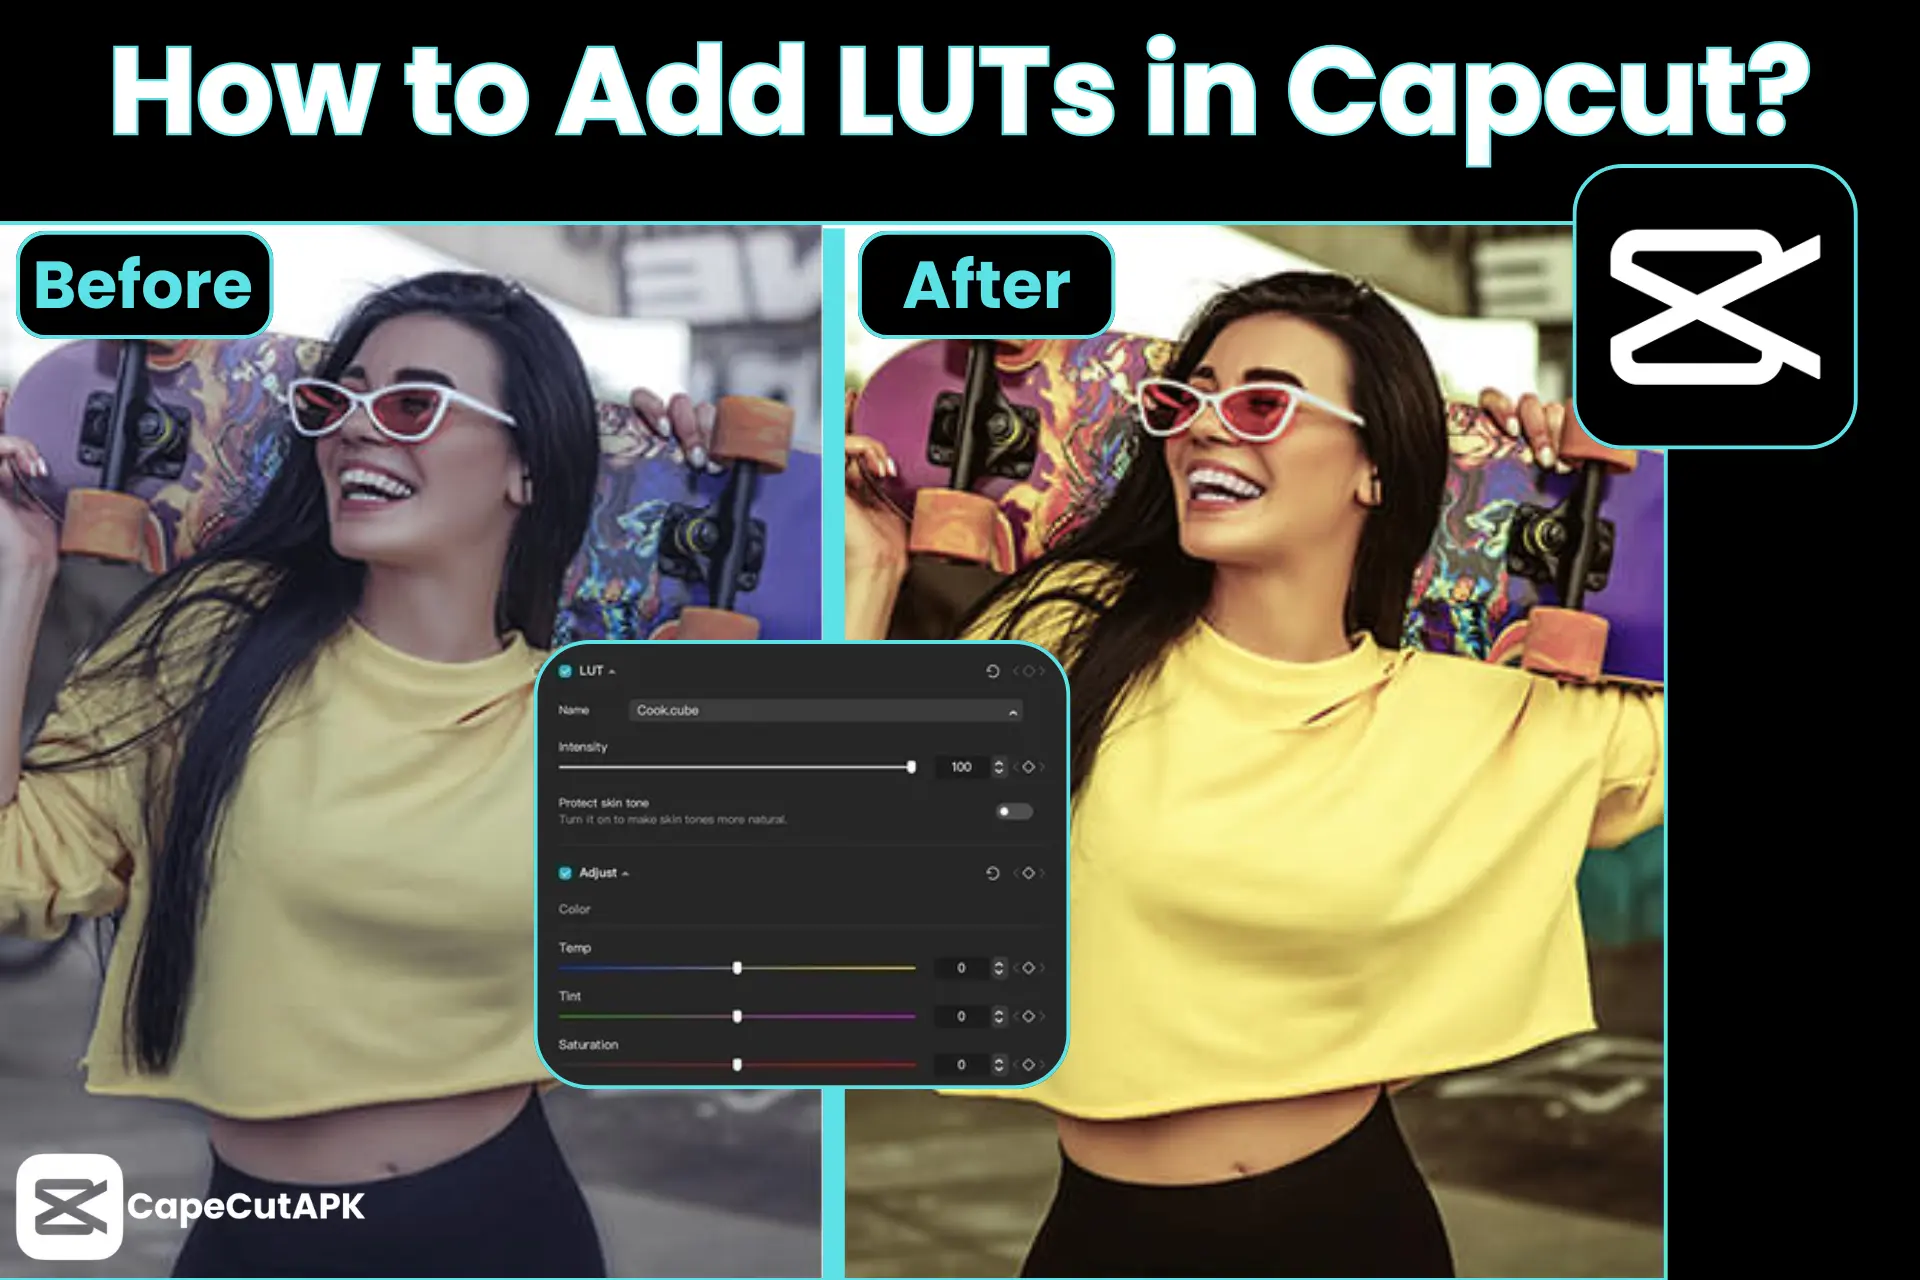
Ever wondered about being a professional creator, or how to add LUTs in Capcut to give your videos a cinematic appearance? Luts (Look-Up Tables) change the log footage into vibrant, appealing videos by applying a specific aesthetic, a teal and orange look, a warm retro feel, or a desaturated, gritty style.
In this article, you’ll get a quick guide on “how to add LUTs in CapCut.”
What is LUT in Capcut?
LUT in Capcut is a quick preset to add, change, and diversify a dull video into cinematic, mood enhancer, and standardize content. In the 1990s and 2000s, in editing, the LUT originated for color grading in filmmaking. In Capcut Pro APK, LUTs became prominent in use in 2024 and early 2025. It is supported fluently in the Capcut PC version. Unfortunately, the Android version does not support the import of preset files. To get rid of, users use other color filters that entirely fulfil the LUT’s expectations in editing.
How to Add LUTs in CapCut?
Steps to Add LUTs to Capcut on Mobile:
In a few taps, Capcut makes you create much higher-quality, attractive, and pro-looking content. Importing LUTs in CapCut is child’s play. Let’s follow the steps given below to add color grading to the video:
Step 1: Open the Capcut Pro app and import your footage.
Step 2: Once the video project is set on the editing timeline, you’ll see the Adjustments tool in the toolbar.
Step 3: Click on the “Filter” option to add color effects.
Step 4: Apply the color effects and adjust them according to your choice.
Step 5: When you hit the “Apply” button, you’ll see the “Apply to all” option. Follow it to make all the video segments the same color.
Step 6: Fine-tune the clips and export to your device.
Steps to Add LUTs in Capcut In PC:
Step 1: Launch the Capcut on the laptop.
Step 2: To start editing the project, click on “Import” video clips. Now, your workspace is ready to add LUTs to your video.
Step 3: Here, make sure the sequence and alignment of your clips.
Step 4: In the “Adjustment” field, you’ll find a few options, including LUT. Just tap gently on it.
Step 5: Now, all you have to do is click on the “Import” button. (“.cube” and “.3dl” are commonly supported LUT file formats).
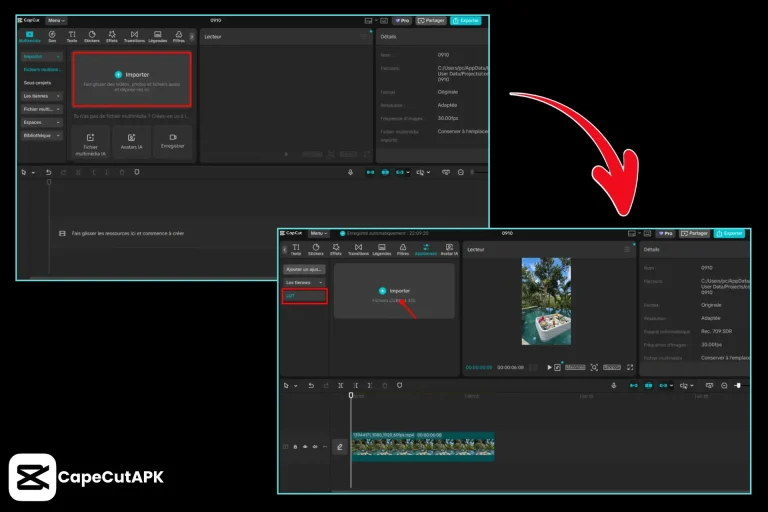
Step 6: Now, click on the clip, Adjustment→ Basic → LUT. Now, click on the imported conversion LUT.
Step 7: Now, tap on the adjustment layer to adjust the further color settings.
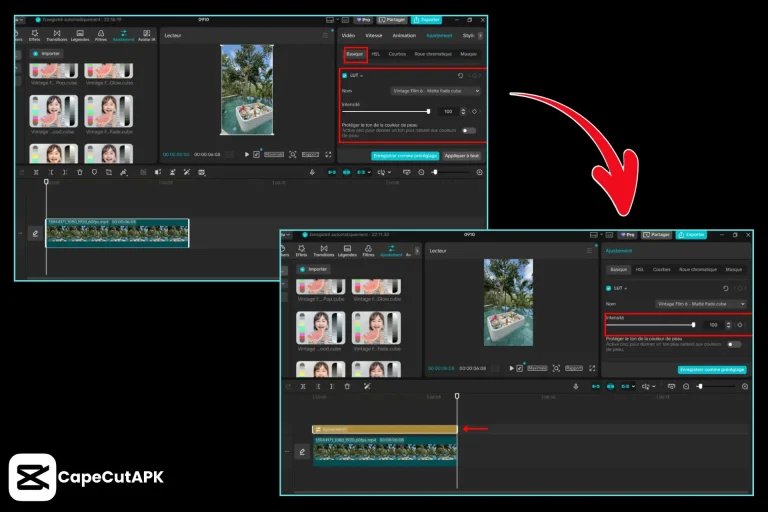
Step 8: Preview the project and export.
Some Important LUTs
In the editing world, these are the common LUTs used by the creators:
| LUT Name | Effect |
| Rec.709 | Natural colors |
| S-Log LUT | Restores contrast |
| V-Log LUT | Better color range |
| C-Log LUT | Balanced tones |
| Black & White | Monochrome look |
| Teal & Orange | Blue shadows, warm skin |
| Vintage | Faded, warm tones |
| Film LUT | Soft, realistic colors |
| Cool Tone | Cold feel |
| Warm Tone | Cozy feel |
| HDR | Bright highlights |
| High Contrast | Dramatic look |
| Low Contrast | Soft look |
Why Add LUTs to CapCut?
In editing, LUTs play an important role for the creators. There are the following reasons why to use LUTs in Capcut Pro:
Professional Content:
LUTs turn your content professional-looking by enhancing the color filters.
Time Saving:
Just like the templates, color-grading presets improve the content quality in seconds with a single click.
Color Consistency:
Using LUT files creates a specific color tone for your content in each video you create.
Mood Enhancer:
LUT converts a flat video into a bright and much higher-quality video.
Conclusion
LUTs feature in Capcut, offering template-like color grades that are just a click away to stylize your videos. LUTs speed up the editing work and make the content provide brand visuals. Once you use a color file, you can use it again for the next projects for the same results.
For project editing, you’re recommended to use Capcut Pro on PC as the LUTs are supported on the PC version, but you can still obtain the color enhancements by using colors and filters on mobile.